Below are the instructions to add your organizations Azure AD Single Sign on to BrightonID. At the end of the document there are a is a link to send the appropriate info to our support team to enable it.
- Sign in to Microsoft Entra
- Click on Entra ID
- Click on Enterprise Apps

- Click on new application

- Click Create your own application
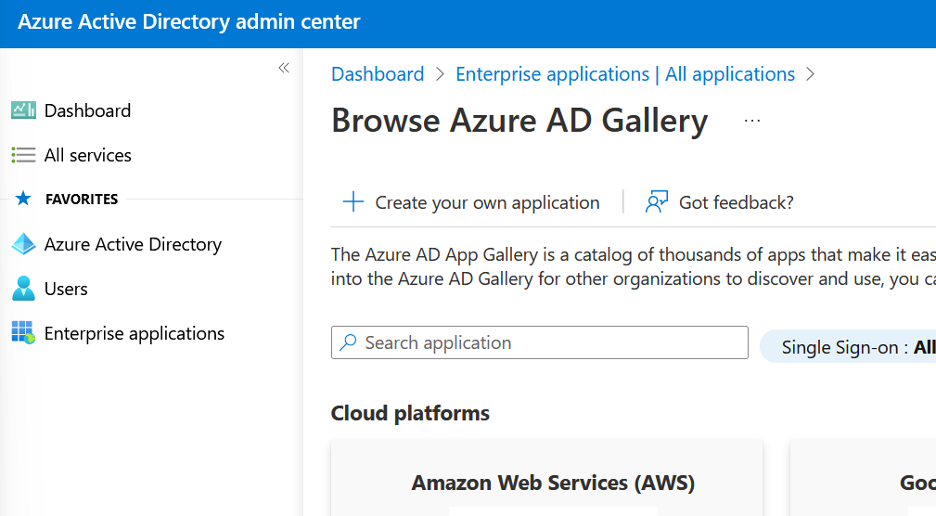
- Create the name "BrightonID - Brighton Science" for the app name

- Then, click Register an application to integrate with Azure AD (App you are developing).
- Select the top option for Accounts in this organizational directory only.
- For the Redirect URI, you will need to add two URIs.
- select "web" and enter: https://login.brighton-science.com/login/callback
- select "web" and enter: https://clerk.brighton-science.com/v1/oauth_callback
- Then click register.
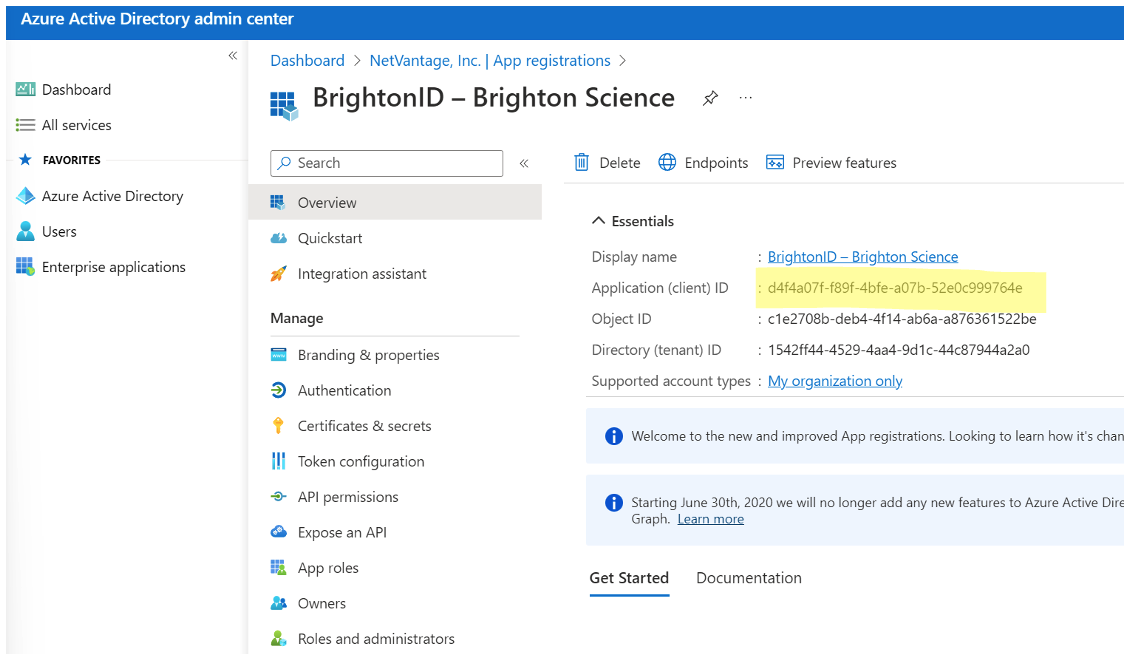
- Click Azure Active Directory, then App Registrations, then click on your new application
- Take note of the Client ID(you will need it later)
- Click on Certificates & Secrets
- Then click + New Client Secret
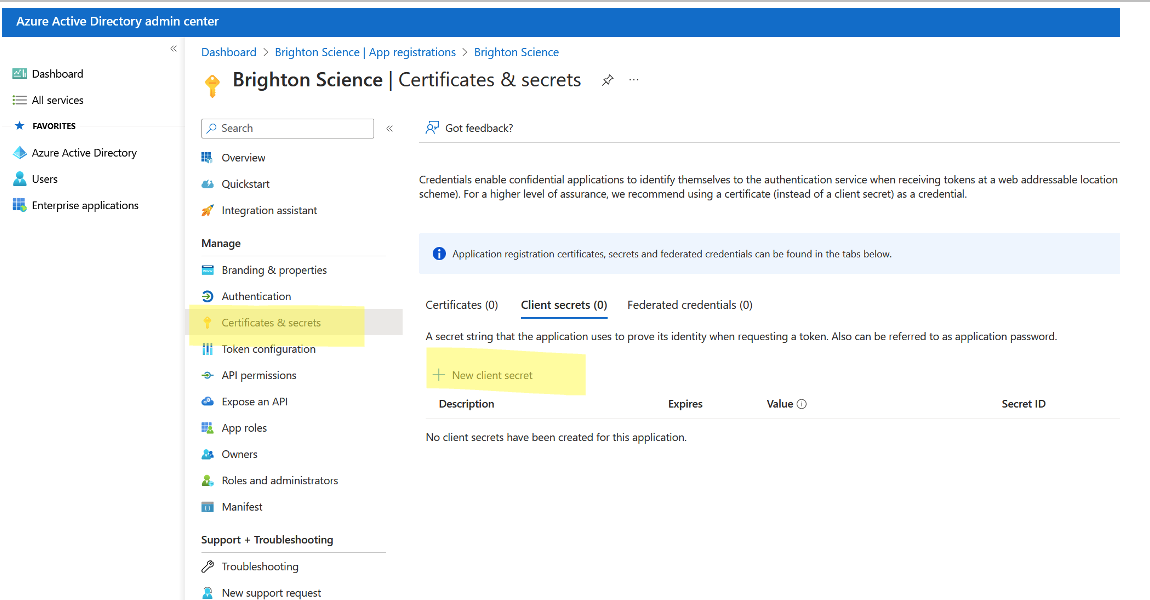
- Name your Secret and set the expiration date(recommend at least 24 months). Then click Add.

- Copy the Value field and keep it safe, you cannot see this value again(you will need this "Secret" later).
-
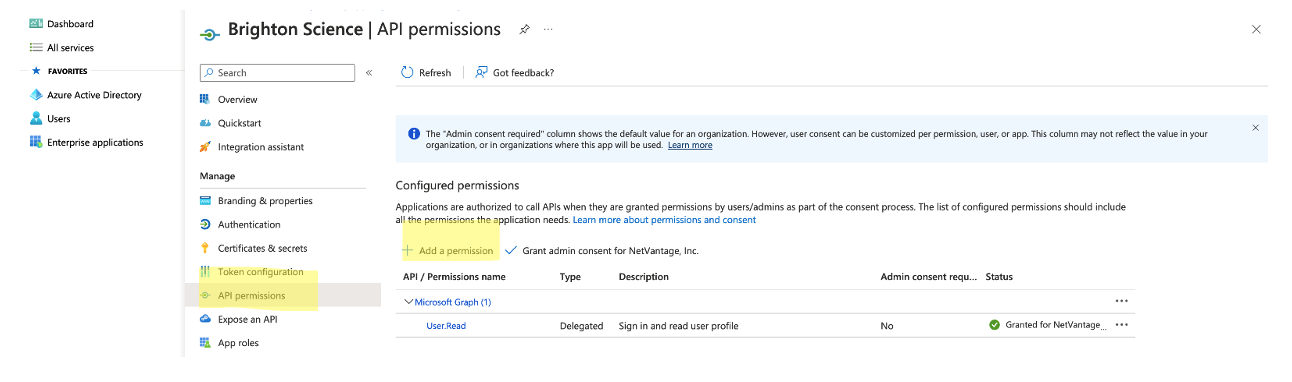
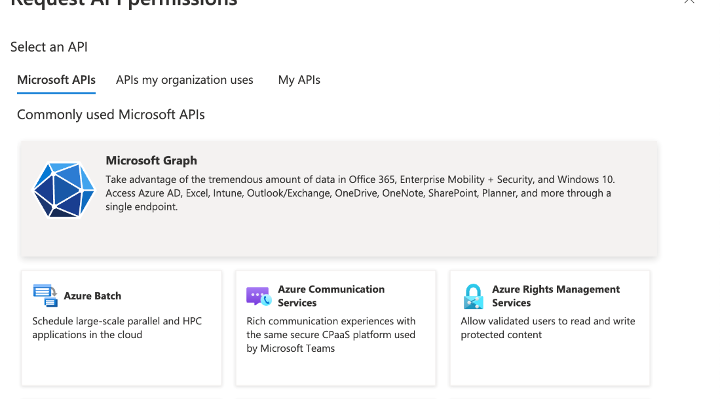
Go to API Permissions
-
Click Add the following permissions:

-
Click on Microsoft Graph
-
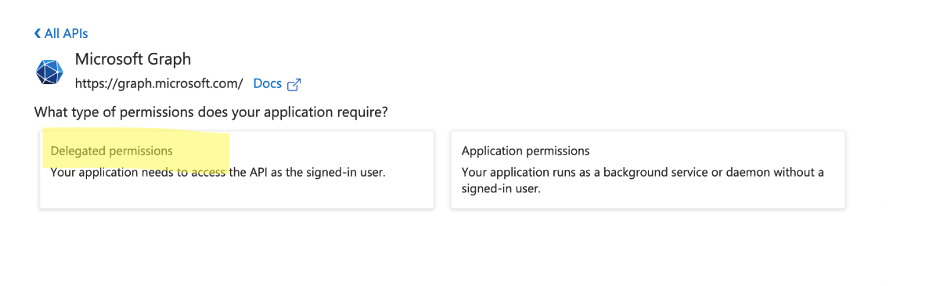
Click Delegated Permissions
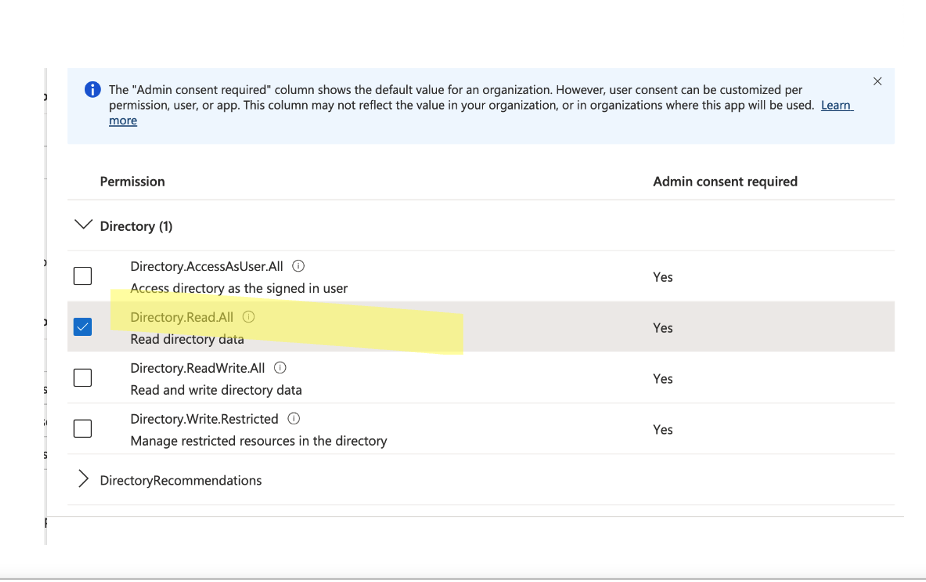
- Click Directory.Read.All
-
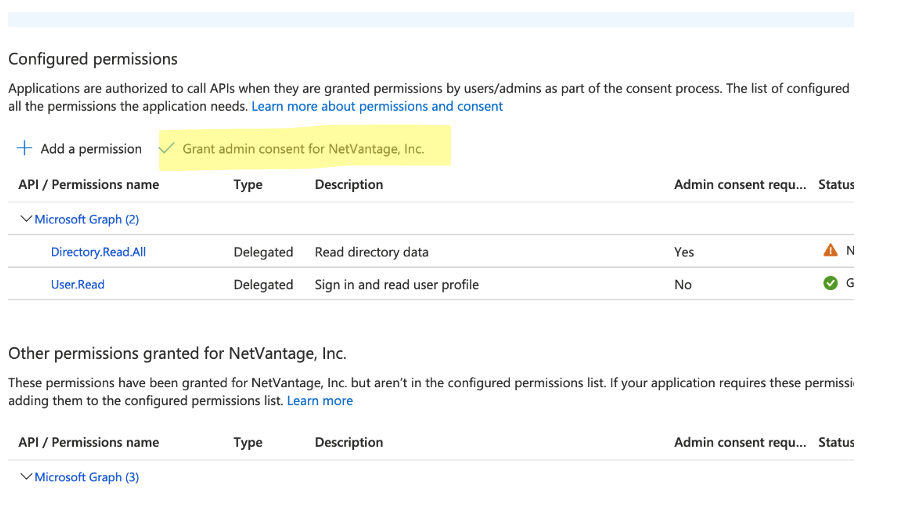
Then click grant admin consent for your organization
- With that complete, send us the information we need to enable your Single Sign On. This information includes:
REQUIRED INFO:
- ClientID(example: 9cb7e54e-c1fe-483c-8286-750b11cf4ce0)
- This is an id that you saved from the previous creation process.
- Client Secret(example: MgR8Q~gBK12yW.~pCOsKvEtydyDda82hg7axFawc)
- This is a secret that you saved from the previous creation process.
- Microsoft Azure AD Domain(example: btglabsgcc.onmicrosoft.com)
- This is your main tenant Azure AD Domain, which could be different from your e-mail domain.
- Email Domain(s)(Example: brighton-science.com, btglabs.com)
- These are an e-mail domains your users may use for their e-mail addresses. This is what we use to detect a user from your org and authenticate them with your process, so you only need to include e-mail domains your users would use.
- ClientID(example: 9cb7e54e-c1fe-483c-8286-750b11cf4ce0)
OPTIONAL INFO (you can include all, none or some of these):
-
- Logo URL: A full URL to a PNG file of your company logo
- Primary Branding Color(In hex, e.g. #0059d6)
- Login Page Background Color(In hex, e.g. #0059d6)
Our support team will configure your environment and reach out for you to test and complete the process.
- After setup is complete, your users will see our standard login page. After entering their e-mail the page remove the password:
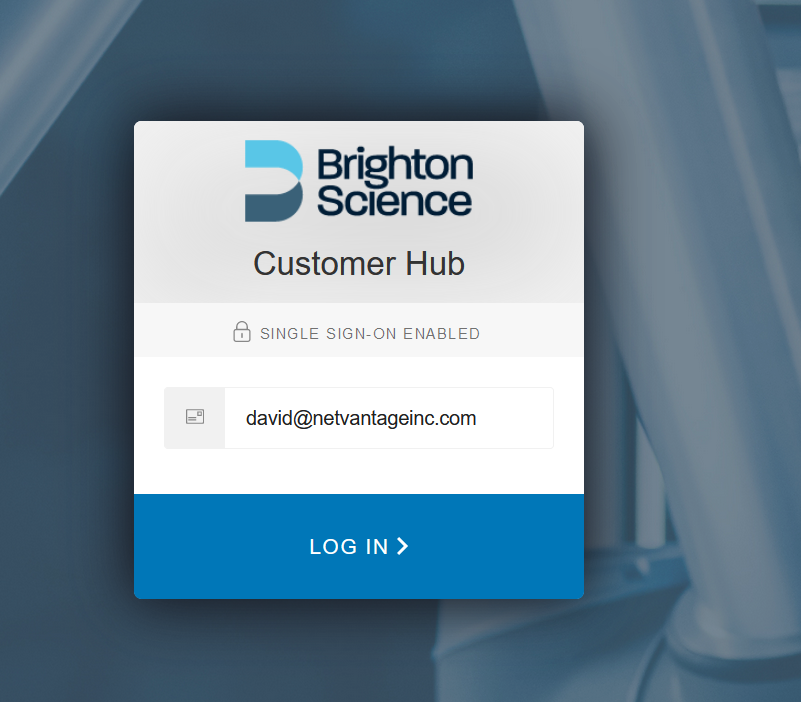
- Upon clicking "Log In", they will either:
- be logged in automatically(if they are already logged into Azure AD with an active session, per your tenant settings) or
- Will see your Azure AD login screen to login
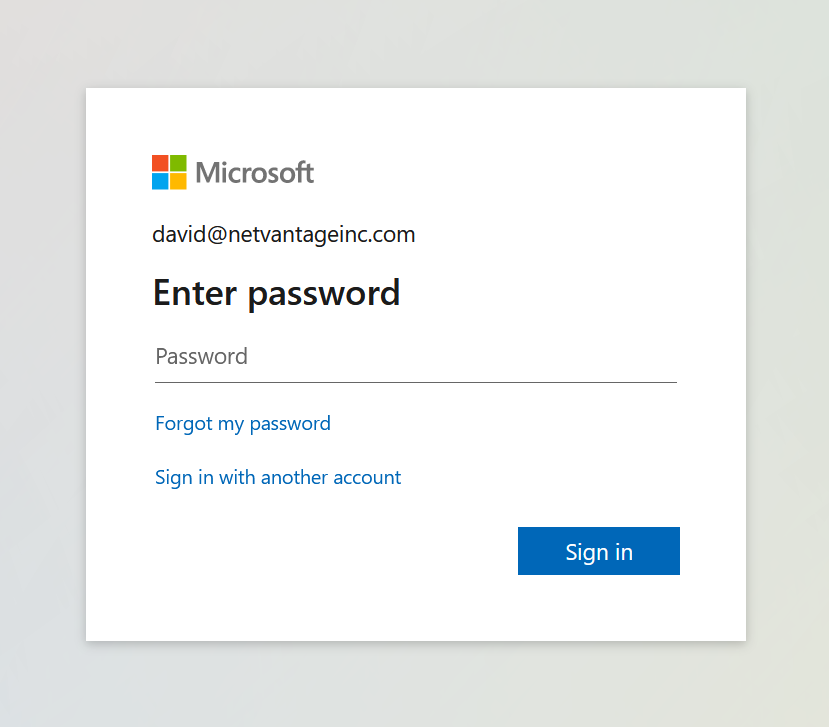
- After login they will be directed to the Brighton Science resource.